
Getting the Most from Your Smartphone Camera's Manual Controls
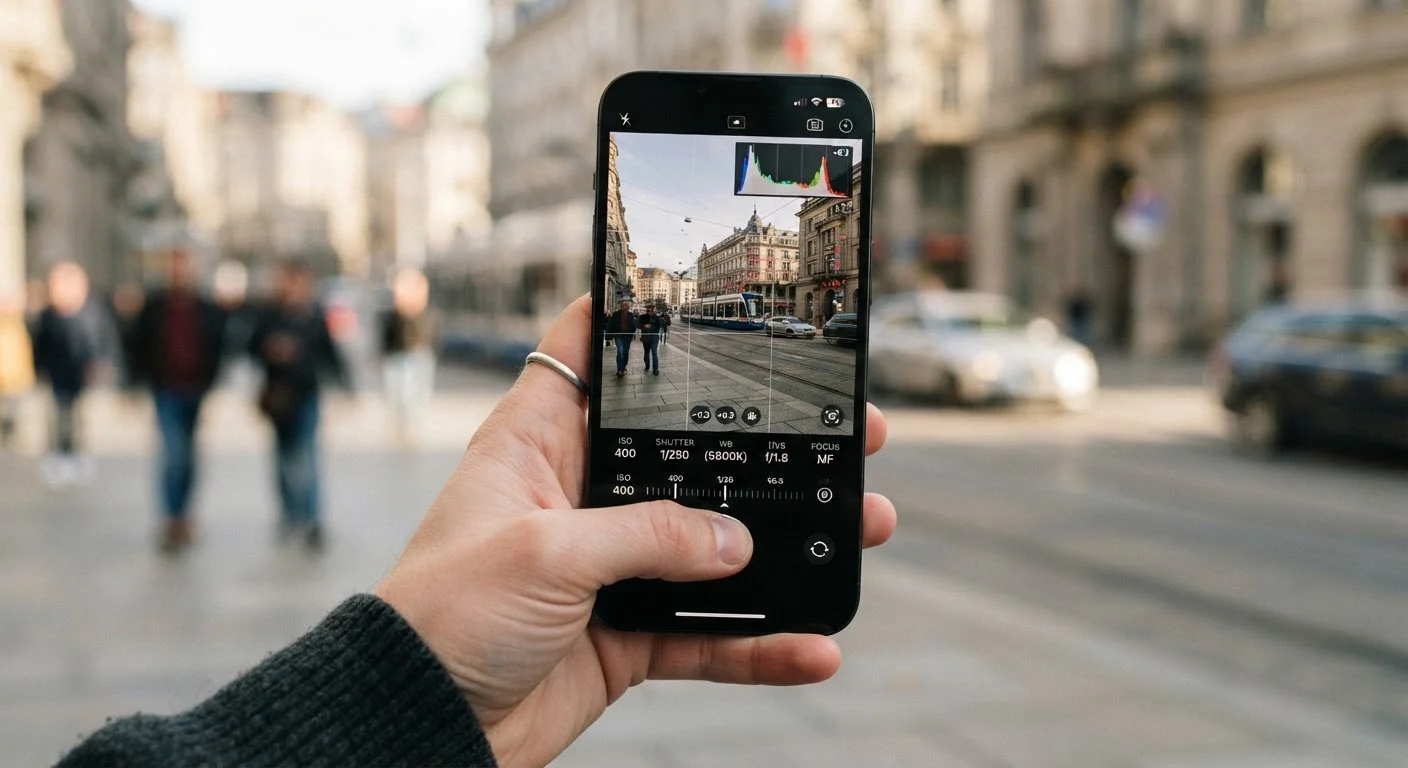
Photo credit: Telecom360.net | Connecting You To The Latest In Telecom
In this article
ISO, shutter speed, white balance, and focus can be dialled in manually on most modern phones. Here's how each control shapes your shot.
Key Takeaways
- ISO controls sensor sensitivity; higher values brighten dark scenes but introduce visible noise.
- Shutter speed determines motion blur - slow speeds trail movement, fast speeds freeze it.
- White balance shifts color temperature to match the light source in your scene.
- Manual focus gives precise control that autofocus can miss in low contrast or macro situations.
- Most Android phones expose these controls in a Pro or Manual mode; iPhones require a third-party app.
Why Manual Controls Matter on a Smartphone
Automatic camera modes on modern smartphones are genuinely impressive. Scene detection, multi-frame HDR, and AI-driven exposure decisions produce competent images across a wide range of conditions. But automatic systems optimize for an averaged result - they cannot know whether you want a frozen subject or an intentional motion blur, a warm interior mood or a clinically neutral color rendering. Manual controls transfer those decisions to you.
The four parameters covered here - ISO, shutter speed, white balance, and focus - map directly to the controls available on dedicated cameras. Understanding what each does allows you to predict, rather than react to, how your shot will look. For additional context on how optical hardware interacts with these settings, see our camera specs guide.
What you will need
Built-in Pro / Manual Camera Mode
Exposes ISO, shutter speed, white balance, and focus controls directly within the native camera app.
Third-Party Camera App (e.g., Halide, ProCamera, Camera FV-5)
Required on iOS and useful on Android for finer control, RAW output, and live histogram display.
Tripod or Stable Surface
Essential for shutter speeds below 1/60 s to eliminate camera shake blur.
Step-by-Step: Taking Manual Control
The steps below apply to any smartphone with a Pro or Manual shooting mode, and to third-party apps that expose the same parameters. Work through them in order the first time - each setting interacts with the others, and building a mental model of those relationships takes a few deliberate sessions.
Open Pro or Manual Mode
Navigate to your camera app and locate the shooting mode selector - typically a swipe or a mode carousel. Select Pro, Manual, or Expert mode. On iOS without a native option, open your chosen third-party app and enable manual controls in its settings. You should now see sliders or dials for ISO, shutter speed (often labeled SS or TV), white balance (WB), and focus (MF).
Set Your ISO
ISO measures how sensitive your sensor is to light. Lower values (ISO 50-200) produce cleaner images in good light. Higher values (ISO 800-6400) brighten dark scenes at the cost of luminance noise - the grainy texture that obscures fine detail. Start at the lowest ISO your scene allows, then raise it only as needed. Understanding how sensor size interacts with ISO noise is covered in depth in our sensor size explainer.
Choose a Shutter Speed
Shutter speed (expressed as a fraction of a second, e.g., 1/1000 s or 1/30 s) controls how long the sensor is exposed. Fast speeds (1/500 s and above) freeze motion - useful for sports or action. Slow speeds (1/30 s and below) allow more light in and create motion blur, which can be used artistically for light trails or silky water. A handheld minimum of roughly 1/focal-length is a useful rule of thumb - below that, use a tripod or surface to avoid camera shake.
Adjust White Balance
White balance (WB) shifts the color temperature of your image to compensate for the dominant light source. It is measured in Kelvin (K): lower values (2700-3500 K) render warm, amber tones suited to incandescent or candlelight; higher values (6000-8000 K) render cool, blue tones matching overcast or shade conditions. Setting WB manually prevents the camera from changing your color rendition between frames - critical for consistency in a sequence. Common presets include Daylight, Cloudy, Tungsten, and Fluorescent as starting points.
Set Manual Focus
Manual focus (MF) lets you choose the exact focal plane rather than relying on phase-detection or contrast autofocus. Most Pro modes display a focus distance slider or a numerical distance scale. Slowly drag the slider while watching the subject - many apps provide a focus peaking overlay (colored edge highlights on in-focus areas) to confirm sharpness. Manual focus is especially valuable for macro distances, shooting through glass, or scenes where the autofocus system hunts due to low contrast.
Review and Refine Your Exposure
With all parameters set, take a test shot and evaluate it. If your app offers a live histogram - a graph showing the distribution of tones from shadows (left) to highlights (right) - use it to catch clipped highlights or crushed shadows before committing. Adjust ISO and shutter speed in tandem to maintain the same overall brightness while changing the noise-versus-motion-blur balance. Once satisfied, shoot your sequence. Note that your phone's computational photography pipeline - HDR merging, sharpening, and noise reduction - still operates on JPEG output even in Pro mode; for full control, enable RAW capture simultaneously. The relationship between software processing and your manual inputs is explored further in our piece on computational photography.
Shoot RAW Alongside Manual Controls
Manual mode gives you creative control, but RAW capture preserves that control's full potential. JPEG processing can quietly override your white balance and exposure decisions. Combining the two gives you the most latitude in post-processing without losing your intended look.
Auto Mode Overrides Manual Settings
On many phones, switching back to the default camera mode resets all manual parameters. Before a session, confirm your app retains settings between shots. Some manufacturer camera apps save last-used manual values; others do not.
Troubleshooting Common Manual Mode Problems
Even with manual controls dialled in, a few recurring issues trip up new users:
- Images look correct on screen but noisy in the final file: The preview screen is small and bright - noise is easier to see at full resolution. Enable the noise preview at 100% zoom if your app supports it, or evaluate shots on a larger display after capture.
- Focus keeps snapping back to auto: Some camera apps revert to autofocus when you tap the screen during composition. Check whether your app has a dedicated AF/MF lock toggle separate from the focus slider.
- Colors shift between shots in the same location: Your white balance is likely set to Auto. Lock it to a fixed Kelvin value or a preset that matches your light source.
- Night shots are blurry despite stabilization: Optical image stabilization compensates for camera shake but not subject movement. For very low-light scenes, the complementary approach of multi-frame stacking - used by Night modes - is more effective. See how that works in our Night Mode explainer.
High ISO in Bright Light Causes Clipping
Setting ISO above 400 in daylight conditions will blow out highlights - recoverable in RAW, but not in JPEG. Always lower ISO first before adjusting other parameters when shooting in bright environments. Pair manual controls with RAW capture when precision matters most; see RAW shooting trade-offs for context.

Author
Smartphones Editorial Team
Smartphones Editorial Team is the collective byline for our editorial team and contributor network. Articles published under this byline or an editorial pen name are researched, written, and reviewed according to our editorial standards for clarity, consistency, and independence before publication.
View all articles →